
By Karin Cho
This is part 2 of the brunost series. If you are interested in learning about alternative uses for whey or the history of brunost, click this link for part 1.
Brunost is a Norwegian brown cheese made from concentrated whey. I was very excited to try making brunost at home, but since I had never eaten brunost before, I didn’t have a reference for what it should taste like. Thanks to the ease of online shopping, I was able to buy a block of brunost from a cheese shop in Wisconsin. The one I purchased is produced by TINE®, a Norwegian cheese company.

Image Caption: Goat and cow milk brunost from TINE®
What surprised me the most was that there was very little “goat” flavor in the brown cheese, unlike other cheeses made from goat milk. If you have a chance to buy brown cheese locally, I highly recommend it before trying to make your own just so you have a better feel for what the final product should look, feel, and taste like.
The next step for me was to find a base recipe. Using an English search query, I was able to pull up some references on how to make brunost at home. Two videos I found useful were: Klinken’s Kitchen and Plan It Send It. The first video describes the industrial process for making brunost and the second video shows a step-by-step process on preparing brunost at home. Both of the videos mentioned some key steps and attributes of the intermediate products:
- Cream, milk, or both can be added before or after reducing the whey
- Reduce and brown the whey until it becomes a thick paste, and the thicker the paste, the harder the final product
As many other brunost recipes will tell you, producing this whey cheese is a time-consuming process. Reducing the whey takes hours of heating and stirring if using large volumes. If the heat is too high, the reduced whey will burn. After multiple trials, I made the following recipes that yields a decent brunost to use up some of that leftover whey.
The first recipe is more traditional, in the sense that the ingredients are only whey, cream, and/or milk. The second has an addition of dulce de leche for extra sweetness and deeper color. While testing the brunost recipes, I was introduced to dulce de leche by some colleagues from Argentina, and loved the rich, sweet, but not overpowering flavor. Adding dulce de leche to brunost can also deepen the color to look more like dark caramel.
Brunost Recipes:
Recipe 1: Standard Brunost
Time: 4-5 hrs cooking, 3-4 hrs cooling
Ingredients:
- 1000 g fresh sweet whey
- 50-100 g cream or milk, or you can blend cream and milk at a 1:1 ratio
Steps:
- Line a small container (holds 0.5 qts) with parchment paper.
- In a pot (1.5 qt or bigger), pour in the sweet whey and heat on medium heat to bring to a gentle simmer. Stir every 15 or so minutes and keep an eye on the whey from boiling over.
- The whey may foam and overflow from the pot. Before this happens, reduce the heat and gently stir.
- Keep reducing the whey for a few hours until the whey starts to get a light beige tint. Reduce the heat to medium-low and stir more frequently to prevent the bottom from burning.
- As the whey continues to be heated, it will start to brown and look like caramel. The consistency resembles a thick caramel sauce.
- Weigh the amount of cooked whey in the pot, and add an equivalent weight of the cream/milk/both into the pot. For example, if you have 50 g cooked whey left, add 50 g cream/milk/both.
- Use an immersion blender to mix the two together. You can also use a whisk, but it may take more time.
- Once blended smooth, continue cooking and reducing the mixture until it forms a thick, dark sauce. One indication is to draw a ‘V’ with the mixture and see if it holds a soft shape. Cooling the mixture at this stage will yield a soft brunost. Transfer the hot mixture into the parchment lined container and cool overnight in the fridge.
- For a hardier brunost, continue cooking until a thick paste forms. Transfer the hot mixture into the parchment lined container and cool overnight in the fridge. Due to the lower water content, this brunost is more prone to lactose crystallization, and you may end up with a sandy product the longer it is stored.
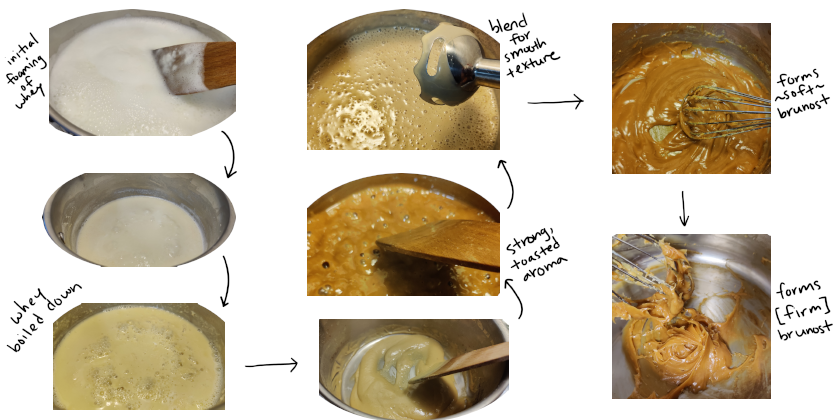
Image Caption: Snapshots of Brunost Preparation Process
Recipe 2: Brunost w/ Dulce de Leche
Time: 4-5 hrs cooking, 3-4 hrs cooling
Ingredients:
- 1000 g fresh sweet whey
- 1 can (14 oz) sweetened condensed milk OR pre-made dulce de leche
- 50-100 cream and/or milk
Steps:
- Preparing dulce de leche (skip if pre-made): Peel off the label and glue from the can. Submerge the can under water in a pressure cooker, and cook under high pressure for 30 min. Allow can to cool completely before opening.
- Line a small container (holds 0.5 qts) with parchment paper.
- In a pot (1.5 qt or bigger), pour in the sweet whey and heat on medium heat to bring to a gentle simmer. Stir every 15 or so minutes and keep an eye on the whey from boiling over.
- The whey may foam and overflow from the pot. Before this happens, reduce the heat and gently stir.
- Keep reducing the whey for a few hours until the whey starts to get a light beige tint. Reduce the heat to medium-low and stir more frequently to prevent the bottom from burning.
- As the whey continues to be heated, it will start to brown and look like caramel. The consistency resembles a thick caramel sauce.
- Weigh the amount of cooked whey in the pot, and add an equivalent weight of the cream/milk/both and dulce de leche into the pot. The ratio I use is 1:1 of cream/milk to dulce de leche.
- Use an immersion blender to mix the two together. You can also use a whisk, but it may take more time.
- Once blended smooth, continue cooking and reducing the mixture until it forms a thick, dark sauce. One indication is to draw a ‘V’ with the mixture and see if it holds a soft shape. Cooling the mixture at this stage will yield a soft brunost. Transfer the hot mixture into the parchment lined container and cool overnight in the fridge.
- For a hardier brunost, continue cooking until a thick paste forms. Transfer the hot mixture into the parchment lined container and cool overnight in the fridge. Due to the lower water content, this brunost is more prone to lactose crystallization, and you may end up with a sandy product the longer it is stored.
The first time I made the brunost, I ended up with a terribly sandy product, so it may take some practice to understand the right consistency. The amount of cream/milk added can be changed depending on your flavor preference. I have also heard of brunost spreads, which I imagine can be made by cooling the mixture before it loses more water at the second heating step.

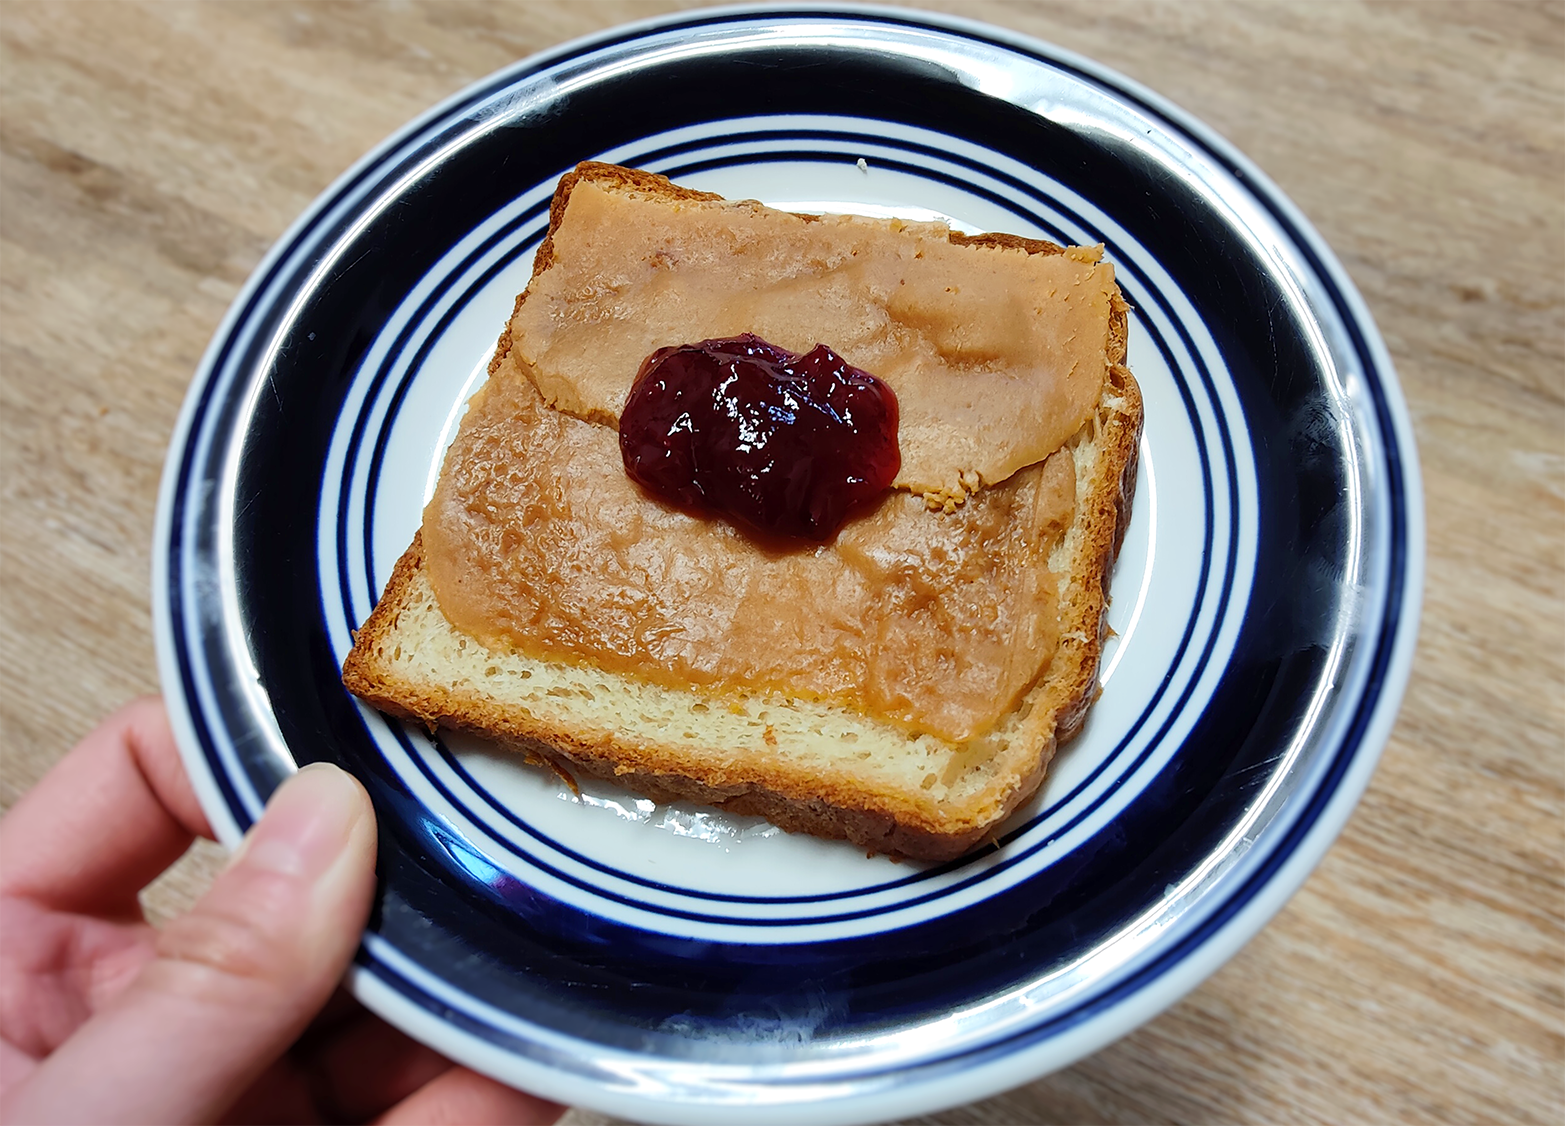
Image caption: Soft brunost made with cream and milk (left) and addition of dulce de leche (right).
Hope you enjoy your brunost!
 Karin Cho | Linkedin
SMF Blog Writer
Karin earned her B.A. in Biochemistry from Grinnell College, and during her time there, she was unsure how to merge her two passions for science and food. After attending several IFT events and completing a QA internship abroad, she decided to pursue a Master’s in Food Science and Technology from Iowa State University. Her research involves the development of fat alternatives. Growing up in a Chinese-Japanese household, she developed a palate for tasting new, sometimes bizarre, foods. When she’s not learning about food science, she enjoys watching science fiction movies, taking walks in parks, and learning new recipes from the people she meets during her travels.


Thank you for sharing a good article about good food and overall your blog is great full of good content. thanks a lot.